One of my best friends requested that I write a post about concealing zits, since unfortunately this is a beauty issue most of us face from time to time.
Depending on whether you use a powder or liquid/cream foundation formula, you will change the order of these steps slightly. If you use a powder foundation (i.e.: mineral foundation), you will conceal prior to applying foundation. If you use a liquid or cream foundation formula, you will conceal after you apply the foundation.
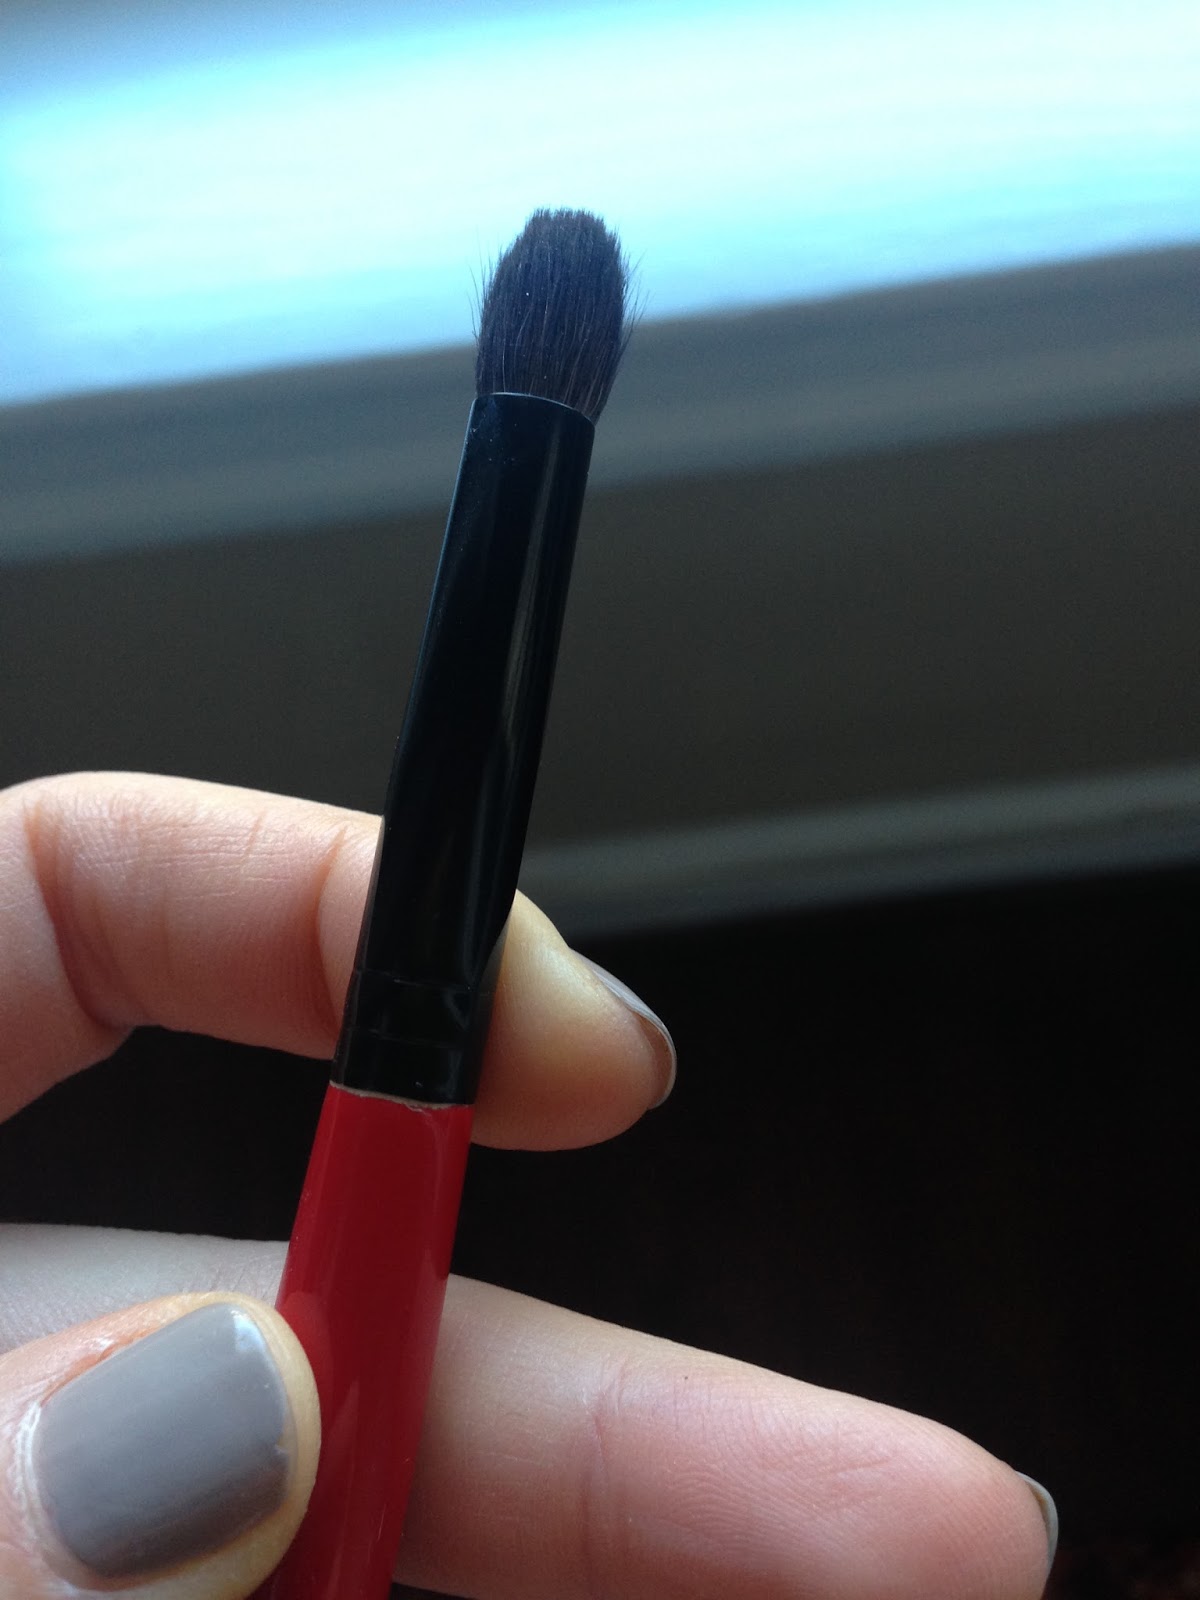
You will need four products aside from your favorite foundation: a small, pointed makeup brush (like this one), a small blending brush, a creamy concealer that matches your skin tone, and a loose powder. I personally use Bare Minerals Correcting Concealer Broad Spectrum SPF 20 in Light 2 and Mineral Veil (original). If you have spots that are very red, you may also want to use a green color corrector prior to the concealer, which will neutralize the redness.
1. Dip the brush into the concealer. You only need a little bit of the product on the very tip of the bristles (no need to waste product!). Apply directly to the zit using a stippling motion, making sure not to conceal the area around it.
2. Using your finger, lightly tap over the concealed spot. This helps to press the product into the skin (so it does not look as if it is sitting on top of the skin) and will give the most natural look.
3. Using a small blender brush, apply the loose powder directly to the concealed spot to help set it. Use a delicate touch so you do not uncover the concealer you just applied.
4. Repeat as necessary for additional zits/red spots.
There you have it- pretty simple. The most important thing to remember is that makeup will only help conceal the redness or discoloration; it will NOT change the texture of the skin (i.e.: erase bumps/inflammation). To help zits heal quickly, do not pick and use your favorite spot treatment daily. You may want to try hydrocortisone cream, which I find helps speed the healing process. I also rub an ice cube over the inflamed area to help reduce the swelling (for those painful cystic acne spots).
Showing posts with label blending brush. Show all posts
Showing posts with label blending brush. Show all posts
Wednesday, June 18, 2014

Saturday, May 10, 2014
Tutorial: Super Quick and Easy Smokey Eye

Since I have not posted a tutorial in awhile, I thought I would share this extremely easy and quick look. It is probably the most fool-proof way of achieving a smokey eye, in my opinion. You really only need three makeup products to achieve this look.
You will need a cream eyeshadow or cream/gel eyeliner product (I used Stila's Smudge Pot in Brown), a neutral eyeshadow for blending (I used the shade "Tease" from my Urban Decay Naked 2 palette, which is a mauvey-taupe color), and a regular eyeliner pencil in either black or brown (on this day, I used Urban Decay 24/7 Glide On Pencil in Zero). You will also need two makeup brushes; a flat, synthetic eye shadow brush (a concealer brush will work perfectly if you do not have a synthetic eyeshadow brush) and a small blending brush.
***This is a side note, but I bought a Wayne Goss flat eyeshadow brush at the Makeup Show last weekend and it is seriously amazing- so soft, and applies product beautifully! If you are in the market for new makeup brushes, these are pretty nice and are sold in handy kits (eyes, face, etc).***
Anyway, back to to business!
1. Apply foundation, concealer, complexion products of your choice. If you are new to the smokey eye technique, you can always start with your eye makeup instead, which allows you to clean up any shadow fall out. Since we are starting with a cream based product, there really shouldn't be much mess though:)
2. Dip your flat eyeshadow brush into your cream eyeshadow/eyeliner product. Using a tiny bit of product, start pressing the eyeshadow color all over your eyelid. Repeat over entire eyelid and then on the other eye. Take the skinny side of the brush and the cream shadow and draw a line under your lower eyelids, starting at the inner corner and drawing toward the outer corner. This does not need to be perfect, since you will be smudging in the next step!
3. Take your blending brush and start blending all over the eyelid in circular motions. Blend upward toward the crease of your eyelid, so the color starts looking diffused. Gently swipe the blending brush back and forth along your lower lash line as well.
4. Dip your blending brush into a neutral eyeshadow and using a windshield wiper motion, blend the eyeshadow into the crease of your eyelid. Once again, gently swipe the brush over the lower lash line carefully.
5. Using your pencil liner, if you wish, line the waterlines of the eyes. This helps enhance the smoldering effect of the smokey eye look.
6. Curl lashes and apply your favorite mascara- and groom brows, of course!
There you have it! Please let me know if you have any questions about any of the products or instructions in this post. If you try this look, please let me know what you think:)
Monday, March 17, 2014
Tutorial: How to Slim Your Nose in a Few Minutes
One of my favorite tricks that is super easy and makes a HUGE difference is contouring my nose. Not that everyone out there needs to create a slimmer schnoz, but if you have a nose that is on the larger and/or wider side, this is a great trick to know. With makeup, you can slim your nose in just a couple of steps. All you need is a matte bronzer or contouring powder (nothing shimmery or sparkly), a eyeshadow brush, and a blending brush. Some people prefer to use a concealer or foundation (a couple shades darker than their skin color) to contour, but for day-to-day makeup, the steps below are easier.
1. After applying your typical complexion makeup (moisturizer, concealer, foundation, etc), swirl the tip of your flat eyeshadow brush into your bronzer or contouring powder. Starting at the upper side of the bridge of your nose (under the head of your eyebrow), lightly trace a line going all the way down to the nostril. Repeat on the other side of your nose.
2. After you have drawn the lines on both sides of the nose, draw a line horizontally from one nostril through the tip of your nose, to the other nostril.
3. Using your blending brush, blend along the bronzer/contour lines you drew to "fade" them into your skin.
And there you have it, a slimmer nose in no time! Below you can compare the difference this makes. I am sorry that I do not have photos from the same day, but you get the point:)
1. After applying your typical complexion makeup (moisturizer, concealer, foundation, etc), swirl the tip of your flat eyeshadow brush into your bronzer or contouring powder. Starting at the upper side of the bridge of your nose (under the head of your eyebrow), lightly trace a line going all the way down to the nostril. Repeat on the other side of your nose.
2. After you have drawn the lines on both sides of the nose, draw a line horizontally from one nostril through the tip of your nose, to the other nostril.
3. Using your blending brush, blend along the bronzer/contour lines you drew to "fade" them into your skin.
And there you have it, a slimmer nose in no time! Below you can compare the difference this makes. I am sorry that I do not have photos from the same day, but you get the point:)
 |
| No contouring |
 |
| Contoured nose:) |
Thursday, February 13, 2014
Tutorial: Purple Lipstick Evening Look
First off, just wanted to apologize for the lack of posts. I am busy preparing for wedding season and learning how to style hair as well (undos and whatnot). I don't mean to neglect my blog, especially since it is still pretty new!
Here is a tutorial for a relatively simple look that works well for night time, and the purple lipstick is a little bit unexpected compared to a red or pink.

1. Prep skin with moisturizer of your choice. If you live in a cold climate (or have dry skin), the more moisture the better! I like to blend Mario Badescu's AHA and Ceramide Moisturizer with some BareMinerals Tinted Moisturizer.
2. Conceal dark under eye circles and any redness (acne, rosacea, etc) with concealer of your choice. This step ensures an even skin tone that will not compete with the lipstick shade. I like Nars Creamy Radiant Concealer for the under eye area and Bobbi Brown Touch Up Stick for the rest of my spots.
3. Apply foundation (if you want or feel you need it), like BareMinerals Original Foundation with a big brush. If you prefer liquid foundation, I also suggest using a stippling brush or Beauty Blender sponge for flawless coverage.
4. Apply bronzer to hairline, down the bridge of your nose, cheekbones and jawline. Then apply a light peachy pink blush. I routinely use Nars Laguna Bronzer and Orgasm Blush.
5. Fill in your brows! If you want to know how, watch my video tutorial:)
6. Prime eyelids with your favorite primer to ensure long-lasting eye makeup. As you may have read previously, I LOVE Urban Decay's Original Priming Potion.
7. Apply waterproof black eyeliner on upper and lower waterlines, smudging into the base of the lashes. This does not need to look perfect, since it will be blended for the finished look. I love Urban Decay 24/7 Glide-on Eye Pencil in Zero.
8. Using a pencil blending brush dipped in a cool-toned taupe eyeshadow, blend and smudge the eyeliner so the line looks diffused and soft. Blend from the lash line up toward the lid. You can add more liner to the waterline if you prefer. I used Urban Decay's Naked 2 Palette for the eyeshadow (I believe I used "Pistol")
9. Swirl on a lighter eyeshadow ("Verve" is the shadow I used) onto the lid using an eyeshadow blending brush (no need to use a shader brush). Then with the same shade of eyeshadow used to blend the liner, apply color to the crease of the eye with the same blending brush. Blend until everything looks as seamless as possible.
10. Curl lashes and apply mascara of your choice. I think I used L'Oreal Voluminous here.
11. Line lips with a neutral lipliner, then apply purple lipstick straight from the tube (I used my favorite MAC Heroine lipstick). Blot lips with a tissue and you are good to go:)
Please let me know how you like this tutorial and / or if there is anything you would like to hear more about!
Saturday, January 18, 2014
A Quick Lesson on the Makeup Brushes Every Girl Should Own
Frequently I am asked about the types of makeup brushes to use to create different types of looks, for example: the cat eye flick, a smokey eye, etc. I wanted to share with you the basic functions of the makeup brushes that can help create the majority of makeup looks- no need to go brush crazy!
The basic rules for makeup brushes are that natural hair brushes (animal hair) are best for powder products and synthetic hair brushes (plastic/manmade fiber) are best for applying cream or liquid products. For natural hair brushes, I suggest splurging on brand name versions since they are generally made better and last longer (no hairs coming out after washing!) I tend to buy MAC Cosmetics brushes because of their good quality, but there are plenty of other brands out there with great brushes as well. There are also plenty of brands that offer inexpensive, well-made synthetic brushes, such as Real Techniques or Bdellium. You can even find some nice kits out there that likely include all of my recommendations below. Anyway, here we go!
7. Concealer brush: Concealer brushes are best to apply cream products to the skin. This allows for precise concealing on the face, such as covering zits or other imperfections. A synthetic version is your best bet.
And if you wear liquid or cream foundation, 8. Foundation brush or Beauty Blender: A foundation brush is used to apply liquid or cream foundation to the face. Using a brush or sponge instead of your fingers ensures that product isn't wasted, and allows for better blending. As with the other cream/liquid products, a synthetic brush will work best.
I hope this helps clear things up when it comes to makeup brush shopping and usage. Please let me know if you have any questions or comments.
The basic rules for makeup brushes are that natural hair brushes (animal hair) are best for powder products and synthetic hair brushes (plastic/manmade fiber) are best for applying cream or liquid products. For natural hair brushes, I suggest splurging on brand name versions since they are generally made better and last longer (no hairs coming out after washing!) I tend to buy MAC Cosmetics brushes because of their good quality, but there are plenty of other brands out there with great brushes as well. There are also plenty of brands that offer inexpensive, well-made synthetic brushes, such as Real Techniques or Bdellium. You can even find some nice kits out there that likely include all of my recommendations below. Anyway, here we go!
 |
| Kryolan Shader Brushes (small and large) |
1. Eyeshadow shader brush: A shader brush allows you to apply eyeshadow to the lid. I recommend a good quality natural hair brush, but there are plenty of synthetic versions that work perfectly fine too.
 |
| Smashbox Blending Brush |
2. Eyeshadow blending brush: A blending brush is used to blend (duh!) eyeshadow (or other powder products) to get a seamless result, especially for achieving a smokey eye. You can also use a blending brush to blend concealer on the under eye area, which makes the look more natural. A natural bristle brush with get you the best results.
 |
| MAC Spoolie Brush |
3. Spoolie/brow brush: Spoolie brushes can be used to groom brows into shape and also to de-clump mascara.
 |
| MAC Angled Eyeliner Brush |
4. Angled eyeliner brush: A angled eyeliner brush is used to draw on eyeliner (especially good for a cat eye) with a gel or cream product. You can also use this brush to fill in brows with a powder product. A synthetic version is your best bet.
 |
| MAC Blush Brush |
5. Blush brush: A blush brush is used to apply powder products, like blush and bronzer, to the face. Look for a good quality natural brush for the best results.
 |
| MAC Powder Brush |
6. Powder brush: The powder brush is used to apply powder to large areas of the face, mostly to set makeup and blot out shine. Once again a good quality natural bristle brush is best.
 |
| Sigma Concealer brush |
7. Concealer brush: Concealer brushes are best to apply cream products to the skin. This allows for precise concealing on the face, such as covering zits or other imperfections. A synthetic version is your best bet.
 |
| Two different types of foundation brushes: MAC Angled Foundation Brush and Urban Decay's Optical Blending Brush |
And if you wear liquid or cream foundation, 8. Foundation brush or Beauty Blender: A foundation brush is used to apply liquid or cream foundation to the face. Using a brush or sponge instead of your fingers ensures that product isn't wasted, and allows for better blending. As with the other cream/liquid products, a synthetic brush will work best.
I hope this helps clear things up when it comes to makeup brush shopping and usage. Please let me know if you have any questions or comments.
Subscribe to:
Posts (Atom)