Showing posts with label beauty. Show all posts

Friday, March 7, 2014

DIY: Coconut Oil for Deep Conditioning

I know this is really supposed to be a "makeup blog", but I do have a love for all things beauty, including hair products.  Due to the dryness and bitter cold in DC throughout the winter, my hair has been extremely dry and brittle- I am a walking split end!  After reading some other blogs and pinned articles, I decided to try a natural DIY coconut oil treatment for my hair.  I have had a jar of coconut oil in my cabinet (unopened) for almost a year, so I figured this what a start to putting it to good use:) You can buy coconut oil at any grocery store for about $10.  The oil solidifies at room temperature, so it looks thick and gloppy until you either warm it between your hands ( to liquify it) or heat it up.


There are various ways to use coconut oil for your hair, based on the thickness, dryness, etc.  Some people apply it on wet hair, others on dry hair.  Some leave it on for 20 minutes, others sleep with the oil in their hair overnight and rinse it out in the morning.  Do what you feel is best for YOUR hair!  I think used properly, the coconut oil treatment would work on any hair type.  Be sure not to put it near your roots if your hair is on the oilier side.

I decided to apply it to my dry hair, left it in overnight, and washed and conditioned it in the morning.    After scooping coconut oil into my palms and running it through my hair, I put it up in a topknot to sleep.  If you leave it in overnight like I did, you probably want to sleep with either an old pillow case over your pillow or wrap a scarf or turbie towel over your head to prevent oil stains on your bed linens.  When I woke up, I just wet my hair and shampooed and conditioned as usual (I am using Pureology's purple line right now).

Let me tell you, this stuff really works!  Not only do my ends look "healed", but the rest of my hair seems smoother and shinier.  I definitely recommend giving it a whirl, if you are in need of a good deep conditioning treatment.  If you have thicker, coarser hair, you can also use a little coconut oil as a leave in conditioner.  If you decide to give it a try, please let me know what you think:)


Sunday, March 2, 2014

Product Review: Anastasia Beverly Hills DipBrow


If you have read my previous blog posts, you probably are aware of my eyebrow obsession.  I am constantly on the lookout for products that make my routine easier, but also produce a nice, groomed look.  If you are in the market for a new brow product (or just want to try something new!), I have a winner for you!
Anastasia Beverly Hills line specializes in brow grooming products (think brow pencils, liners, gels, stencils, etc), but their newest one is pretty amazing.  DipBrow is a brow pomade that comes in a pot, which you apply with an angled brush.  It comes in a variety of shades, is waterproof, and can be used alone or with other products.  DipBrow provides light control and shading, which is great if your  brows are a bit sparse or light.  It has a nice, powdery finish that does not appear heavy or fake.
I used the DipBrow pomade (in Blonde) this morning for the first time, and I am very impressed with its wear and longevity.  I did not use any other brow products, aside from my angled and spoolie brushes, and my brows are lookin' good! At $18 it is not exactly inexpensive, but it works well and has the potential to cut out other products that you may use in your brow arsenal.  Worth it!


A little DipBrow pot, so you can a feel for the size.

Brow drawn on my hand using the DipBrow in Blonde and an angled brush.


Me wearing Dipbrow!


Thursday, February 13, 2014

Tutorial: Purple Lipstick Evening Look

First off, just wanted to apologize for the lack of posts.  I am busy preparing for wedding season and learning how to style hair as well (undos and whatnot).  I don't mean to neglect my blog, especially since it is still pretty new!  
Here is a tutorial for a relatively simple look that works well for night time, and the purple lipstick is a little bit unexpected compared to a red or pink.


1.  Prep skin with moisturizer of your choice. If you live in a cold climate (or have dry skin), the more moisture the better!  I like to blend Mario Badescu's AHA and Ceramide Moisturizer with some BareMinerals Tinted Moisturizer.

2.  Conceal dark under eye circles and any redness (acne, rosacea, etc) with concealer of your choice. This step ensures an even skin tone that will not compete with the lipstick shade.  I like Nars Creamy Radiant Concealer for the under eye area and Bobbi Brown Touch Up Stick for the rest of my spots.

3.  Apply foundation (if you want or feel you need it), like BareMinerals Original Foundation with a big brush.  If you prefer liquid foundation, I also suggest using a stippling brush or Beauty Blender sponge for flawless coverage.

4.  Apply bronzer to hairline, down the bridge of your nose, cheekbones and jawline. Then apply a light peachy pink blush.  I routinely use Nars Laguna Bronzer and Orgasm Blush.

5.  Fill in your brows!  If you want to know how, watch my video tutorial:)

6.  Prime eyelids with your favorite primer to ensure long-lasting eye makeup.  As you may have read previously, I LOVE Urban Decay's Original Priming Potion.

7.  Apply waterproof black eyeliner on upper and lower waterlines, smudging into the base of the lashes.  This does not need to look perfect, since it will be blended for the finished look.  I love Urban Decay 24/7 Glide-on Eye Pencil in Zero.

8.  Using a pencil blending brush dipped in a cool-toned taupe eyeshadow, blend and smudge the eyeliner so the line looks diffused and soft.  Blend from the lash line up toward the lid.  You can add more liner to the waterline if you prefer.  I used Urban Decay's Naked 2 Palette for the eyeshadow (I believe I used "Pistol")

9.  Swirl on a lighter eyeshadow ("Verve" is the shadow I used) onto the lid using an eyeshadow blending brush (no need to use a shader brush).  Then with the same shade of eyeshadow used to blend the liner, apply color to the crease of the eye with the same blending brush.  Blend until everything looks as seamless as possible.

10.  Curl lashes and apply mascara of your choice.  I think I used L'Oreal Voluminous here.

11.  Line lips with a neutral lipliner, then apply purple lipstick straight from the tube  (I used my favorite MAC Heroine lipstick).  Blot lips with a tissue and you are good to go:)

Please let me know how you like this tutorial and / or if there is anything you would like to hear more about!


Wednesday, February 5, 2014

Super easy, glasses-wearer friendly makeup tutorial

Here is a very simple look, which is perfect for anyone really, but especially for those who wear glasses.  When you wear glasses, you don't need to wear as much makeup (generally speaking), which is awesome.  You do have to play up certain features, like your brows and lips, so the glasses don't take over your entire face.   I myself have worn glasses since I was three, so I know a thing or two about how to do this:)


All you need is to follow your typical complexion makeup routine (tinted moisturizer and some concealer in my case) and follow these steps:

1.  Fill those brows!  If you don't know how, check out my "How to" video on this blog:)  This step is the most important, since the brows frame your eyes and glasses.  Plus, it makes you look more put together.

2.  Swipe on some shimmery taupe eyeshadow on your entire eyelid, all the way up to your crease and blend.  No need for multiple eyeshadow shades for this look!  I used one (Verve) from my trusty Urban Decay Naked 2 Palette.  

3.  Draw on a very thin line of black (or gray, if you prefer) eyeliner on your upper eyelids.  I used liquid to get a super skinny line, but any liner will work just fine.  

4.  Apply two coats of your favorite mascara on top and bottom lashes.  If you have any clumps, make sure to comb them out!  I used one of my favorites, L'Oreal Voluminous False Fiber Lashes.

5.  Apply a pretty lip color, preferably a medium peach or coral, which looks great on most skin tones.  I used Nars Satin Lip Pencil in Lodhi. 

6.  Apply a swirl off peach-pink blush onto your cheeks.

And there you have it!  Simple and pretty in no time at all:)   

Sunday, January 26, 2014

Inspiration of the Week: Highlighted Eyes

A slew of gorgeous models, including Doutzen Kroes (one of my favorite models) at the Victoria Secret Fashion Show, sporting the glow-y gaze.  All photos from Pinterest, collage made in PicCollage.  

I am loving the simple, clean look of a highlighted inner eye with healthy, radiant skin.  You can achieve this look easily with any pearly eyeshadow dabbed around the tear ducts.  Add some black mascara and a hydrating tinted moisturizer, and you are done!  To enhance this look, apply some peach blush lightly to the apples of your cheeks.  This look works for all skin tones!

Tuesday, January 21, 2014

Thought I would share: MAC Haul

If you are like me, seeing makeup others have in their collection or have purchased is strangely addictive and fun.  I recently renewed my MAC Pro Membership, so I had a little shopping spree.

Assorted eyeshadows (Shroom, Gleam, Star Violet, Sketch, Carbon, Woodwinked, Soot, Plum Dressing, Sumptuous Olive), liquid eyeliner (Boot black), lipstick (Heroine), Chromaline cream liner (Black), mixing medium, glitter (Gold), lipmix (Clear Gloss), and powder puffs.
This is what I bought.  I actually love the eyeshadows and lipstick a lot.  The rest I have not yet tried, but since they will be going into my freelance kit, I am sure they will come in handy.  Just thought you might like a peak!


Sunday, January 19, 2014

Inspiration of the Week: Purple lipstick

Lately I have been more inclined to paint on a bright lipstick rather than wear a dark eye.  I have tried various reds, pinks and even orange shades, and have been quite happy with the look that the dose of color adds.  After browsing through Pinterest, I found that I was pinning quiet a lot of purple lip shades.  Maybe it is because it is a little different and fun, but still looks cool and chic.  I don't know;  I do know that I like the look and plan to wear it as a alternative to red more often.  Aside from the violet lipstick, not much else is needed.  Maybe some tinted moisturizer and concealer to even the skin, a few coats of mascara and a little black liner, and you are good to go.  Remember that the darker your skin tone, the deeper the shade you can choose for the lips.  

Photos courtesy of Tumblr via Pinterest, BehindM blog/Elle via Pinterest, and Instagram via Pinterest(Jessiiistephiii).  Collage created with PicCollage app.

My suggestions to try-
Medium skin: MAC Heroine 

Me sporting my MAC Heroine lipstick


Saturday, January 18, 2014

A Quick Lesson on the Makeup Brushes Every Girl Should Own

Frequently I am asked about the types of makeup brushes to use to create different types of looks, for example: the cat eye flick, a smokey eye, etc.  I wanted to share with you the basic functions of the makeup brushes that can help create the majority of makeup looks- no need to go brush crazy!
The basic rules for makeup brushes are that natural hair brushes (animal hair) are best for powder products and synthetic hair brushes (plastic/manmade fiber) are best for applying cream or liquid products.  For natural hair brushes, I suggest splurging on brand name versions since they are generally made better and last longer (no hairs coming out after washing!)  I tend to buy MAC Cosmetics brushes because of their good quality, but there are plenty of other brands out there with great brushes as well.  There are also plenty of brands that offer inexpensive, well-made synthetic brushes, such as Real Techniques or Bdellium.  You can even find some nice kits out there that likely include all of my recommendations below.  Anyway, here we go!

Kryolan Shader Brushes (small and large)

1.  Eyeshadow shader brush:  A shader brush allows you to apply eyeshadow to the lid.  I recommend a good quality natural hair brush, but there are plenty of synthetic versions that work perfectly fine too.

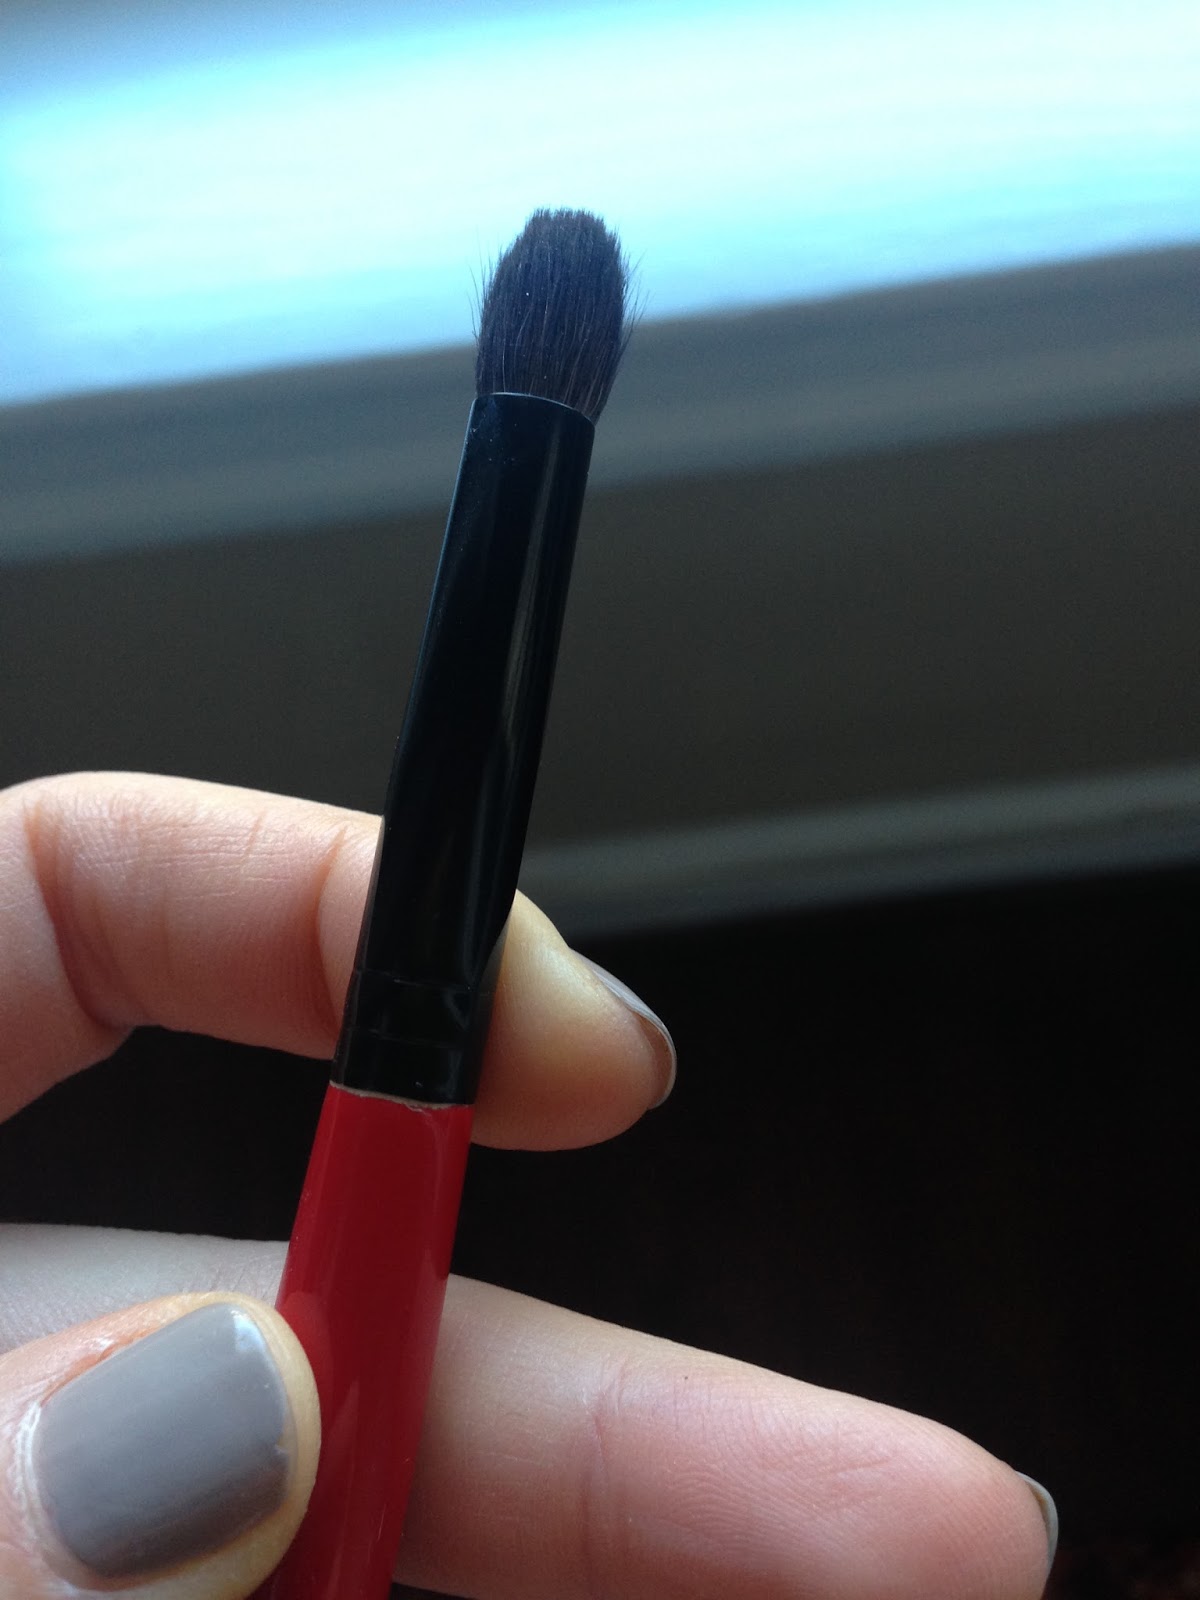
Smashbox Blending Brush

2.  Eyeshadow blending brush: A blending brush is used to blend (duh!) eyeshadow (or other powder products) to get a seamless result, especially for achieving a smokey eye.  You can also use a blending brush to blend concealer on the under eye area, which makes the look more natural.  A natural bristle brush with get you the best results.  


MAC Spoolie Brush

3.  Spoolie/brow brush: Spoolie brushes can be used to groom brows into shape and also to de-clump mascara.

MAC Angled Eyeliner Brush

4.  Angled eyeliner brush:  A angled eyeliner brush is used to draw on eyeliner (especially good for a cat eye) with a gel or cream product.  You can also use this brush to fill in brows with a powder product.  A synthetic version is your best bet.

MAC Blush Brush

5.  Blush brush:  A blush brush is used to apply powder products, like blush and bronzer, to the face.    Look for a good quality natural brush for the best results.

MAC Powder Brush

6.  Powder brush:  The powder brush is used to apply powder to large areas of the face, mostly to set makeup and blot out shine.  Once again a good quality natural bristle brush is best.  


Sigma Concealer brush

7.  Concealer brush:  Concealer brushes are best to apply cream products to the skin.  This allows for precise concealing on the face, such as covering zits or other imperfections.  A synthetic version is your best bet.

Two different types of foundation brushes: MAC Angled Foundation Brush and Urban Decay's Optical Blending Brush

And if you wear liquid or cream foundation, 8.  Foundation brush or Beauty Blender:  A foundation brush is used to apply liquid or cream foundation to the face.  Using a brush or sponge instead of your fingers ensures that product isn't wasted, and allows for better blending.  As with the other cream/liquid products, a synthetic brush will work best.

I hope this helps clear things up when it comes to makeup brush shopping and usage.  Please let me know if you have any questions or comments.  

Friday, January 10, 2014

Urban Decay Naked 2 Tutorial (and new hair!)

I wanted to share a quick and easy tutorial using the Urban Decay Naked 2 palette.  If you do not have the Naked 2 palette, any range of neutral eyeshadows should work.  The palette is definitely worth the money if you are in the market for new eyeshadow, just putting it out there:)


My new hair color and the makeup look in the tutorial:)

1. Apply complexion products as you prefer. I applied my normal moisturizer, Bareminerals foundation, concealer under my eyes and on red spots.

2.  Apply bronzer (Nars Laguna is my go-to) around the hairline, cheekbones, jawline and down the nose.

3.  Swirl on blush of your choice.  I almost always use Nars Orgasm, but since the rest of the look is pretty neutral, any pink or peachy shade should work well.

4.  Prime eyelids with a primer you like.  I always use Urban Decay Primer Potion, since it is the BEST for keeping shadow in place all day.  I also recommend putting a little on the lower lash line too.

5.  Using a shader (flat) brush, apply Suspect (a light shimmery beige) to the inner corners of the eyes to about a third of the way across the lid, blending it slightly toward the tear duct.

6.  Next, apply Snakebite (a medium bronze) to the remaining two-thirds of the eyelid.  Then use a eyeshadow blending brush to lightly blend the colors together.

7.  On the outer "V "of the eyes, apply Busted (a deep burgundy) with a pencil blending brush.  Again with the regular eyeshadow blending brush, blend all three colors together in a windshield wiper motion.  When blending, you should make sure the shadows look like a gradient rather than three separate, disjointed colors.

8.  With a pencil blending brush, apply Snakebite to the lower lash line.

9.  Apply black eyeliner of your choice to the upper lash line.  I chose MAC Fluidline for this look.

10.  Line waterline of lower eyelid with a brown eyeliner (softer than black, but still makes eyes look sultry).  I used Urban Decay 24/7 Glide On Pencil in Whiskey.

11.  Curl lashes, apply mascara, and groom brows.

11.5.  Totally optional, but add your favorite pink lip color.  I used Bite Beauty lipstick in a fuchsia shade.

And there you have it:)  Please let me know if you have any questions or comments about this tutorial or anything else!


Tuesday, January 7, 2014

How are you liking the blog thus far?

Hello my favorite readers, I wanted to point out that I added a little survey for you guys on the upper right side of the blog.  I am trying to get a feel for how you like the content so far and what you like to see most.  Please participate if you can, it should take about 10 seconds:)

Also, I had an amazing photo shoot with one of my favorite photographers, @Michael Woodward, this weekend.  This is just one of the photos (of the gorgeous Theresa Grant)- I hope you like it!  I loved the way the makeup turned out, so just thought I would share.


Sunday, January 5, 2014

Product Review: BareMinerals Faux Glow Face

I am always hesitant to try sunless tanners, especially on my face, since they tend to make me break out.  Since BareMinerals tinted moisturizer, foundation and concealer do not make me break out, I decided to give their version for the face a try.  BareMinerals Faux Tan Face Gradual Glow is a gradual sunless tanner for the face and neck.  It is supposed to provide a golden glow without the damaging effects on the sun.

The instructions for usage of this sunless tanner do not vary from any other kind out there.  Basically apply evenly to clean, dry skin and wash hands thoroughly.  The formula is tinted, so you can ensure the product is evenly distributed on the skin.    You can choose to reapply every day to enhance the color, but I would advise applying every few days, which is enough to beat the pallor of winter and not look like a tanning junkie.

After one use, my skin felt extremely soft and moisturized, and I appeared more bronzed than I ordinarily look at this time of year.  The color is very believable; not too orange or brown.  It also helps disguise discoloration / unevenness a bit too (which means less foundation and concealer!).
I have not had any breakouts from this product so far, so I am pretty pleased.  I would definitely recommend BareMinerals Faux Glow Face sunless tanner.

This product can be purchased at Sephora, Ulta or BareMinerals stores for about $24.

P.S. the line also carries a body formula, which I can't wait to try!

I will try to add a photo soon of the before and after:)

Monday, December 30, 2013

New Year's Eve Makeup Inspiration!

I know it is a little last minute, but I wanted to share my NYE inspiration for tomorrow evening's party look!
Beyonce looking gorgeous, a model rocking some serious liner, and Leighton Meester.

The dress I am wearing (ordered from Rent the Runway for the first time, btw!) is silver and black, and instead of going with the typical smoky eye I am going to rock the classic red lip and cat eyeliner look.  I may even add a pair of full false lashes to bring the look to the next level.  My top choices for the evening: MAC Fluidline in Blacktrack and Rouge Dior Lipstick in 999 Ara Red.  

I promise to update this post with a photo of me from tomorrow evening.  Maybe even a tutorial

perhaps?!

What makeup look are you planning on rocking tomorrow evening?  Please feel free to comment below:)

Update / photo from NYE:


Me and my husband being goofy at the photo booth:) 

Saturday, December 28, 2013

Product Review: bareMinerals Shades of Decadence Collection

First off, I want to apologize about the lack of posts the last week or so.  I am sure you all are busy with the holiday season as well, but I promise I am not being a slacker! I have a couple product reviews coming in the near future, and this is one of them...


For Christmas, I received the bareMinerals Shades of Decadence Collection from my mom (who is also a makeup fanatic, by the way!).  I didn't need more makeup by any means, but I am always happy to try out new and different products that come my way.  This set includes nine eyeshadows and six lip glosses (3 Marvelous Moxie glosses, 3 regular glosses) and comes in a really cute gold box.
The eyeshadow colors are gorgeous, ranging from light, shimmery shades to deeper tones that can double as eyeliner if used with a damp brush. You may even be able to use some of the lighter shades to highlight your face as well.  Although these shadows look gorgeous alone, I would recommend using a eyeshadow primer (Urban Decay Primer Potion is my favorite) to help keep it in place and make the color stand out more.

Shadow colors from top to bottom: Cypress (smoky greenish grey),  Glitz (dark shimmery plum), Atomic Plume (mushroom), Splendid (warm shimmery gold),  Rose Gold (rosy gold, ha!), Aglow (pearly whitish pink), Brave (light gold glitter), Gilt (light gold), and Wink (warm brown)

The lip glosses are very pretty and the shades are wearable.  I have to say that I am a fan of the regular glosses more than the Moxie line, since the latter are a tad too shimmery for my liking.  Still, the lip glosses are nice and would suit most skin tones.  Plus, the regular lip glosses are 100% natural, which always makes me a happy girl.

Lip gloss colors from top to Bottom: Vixen (bright shimmery pink), Temptress (shimmery rose), Tantalizer (shimmery nude), Starfruit (light pink), Wearable Mauve (light rose), Raspberry Truffle (pink).

 The only issues I have with this collection are, a) the eyeshadows are a bit messy, since they are loose powders and b) the 15 separate containers take up a fair amount of space, so they aren't the most portable.
Overall, I think the Shades of Decadence Collection is a good buy, since it is only $39 and comes with so many fun eyeshadow shades and lip glosses.  If you are trying to keep your makeup collection more concise / easy to carry, I would probably recommend skipping it and getting a palette that includes shadows and lip glosses in one compact.

If you have any questions about these products, please let me know.  I plan to do a tutorial with this collection very soon, so be on the lookout!

Saturday, December 21, 2013

My Top 10 Dupes

In case you are not familiar with the world of Pinterest, "dupes" are essentially duplicates or cheaper versions of expensive products.  There are so many great lists already compiled, but I wanted to share some of my personal faves.
 
1. Prestige Liquid Eyeliner ($4.99) vs MAC Liquid Eyeliner ($19.50
These two eyeliners are very similar in texture, finish, and longevity.  They also both have a felt tip applicator which makes for easy application. At under $5, you can't go wrong trying out the drugstore option.

2.  Maybelline Eye Studio Lasting Drama Gel Eyeliner ($9.99) vs MAC Fluidline ($16.00)
Both of these gel eyeliners are long-lasting and have a deep black finish.  The Maybelline formula is a little smoother in texture, while the MAC is thicker.  Both are very easy to use, but the Maybelline version even comes with a little brush!

3.  NYX Eyebrow Pushup Bra ($9.99) vs Anastasia Beverly Hills Duality Highlighting Pencil ($23.00)
Each of these pencils have a matte brightening formula on one end, which are great for highlighting the inner corner of the eyes as well as the brow bone.  The main difference is the NYX version has a regular brow pencil on the opposite end, and the Anastasia has a shimmery highlighter on the other side.

4. L’oreal Voluminous Mascara ($7.99) vs Lancome Hypnose Mascara ($27.00)
Rumor has it that these two brands are manufactured with the same formula.  I happen to LOVE cheap mascara, and the L'Oreal performs beautifully.

5. Revlon Colorburst Kissable Balm Stain ($8.99) vs Clinique Chubby Stick Moisturizing Lip Color Balm ($17.00)
Each of these lipstick balms are glossy and easy to apply, but you can try out more shades without spending as much with the drugstore option.

6. Real Technique Brushes ($6.00 and up) vs any expensive brush (ie: MAC, Sigma, etc)
Real Techniques brushes are excellent quality and offer lots of professional types of brushes that you may not be able to find in other inexpensive brand offerings.  They are all synthetic, which is a plus if you are into animal-friendly products. 

7. Maybelline Magic Lumi Highlighter ($12.99) vs YSL Touche Eclat ($40.00)
Both of these highlighting pens are amazing for disguising dark circles or highlighting the cheekbones.  At less than $15, the Magic Lumi is a steal.  The con for the inexpensive version is the shade offerings are not as extensive.

8. Maybelline Eye Studio Color Tattoo 24hr Cream Gel Eyeshadow ($6.99) vs MAC Paint Pot ($20.00)
Cream eyeshadows are amazing for using as a base or adding richer color to eyemakep.  The Maybelline version peforms wonderfully and lives up to the 24 hour name.  MAC Paint Pots, however, come in a larger array of shades and finishes.

9. Physicians Formula Shimmer Strips (Nude) Palette ($11.99) vs Urban Decay Naked Palette ($52.00, comes with brush)
The Physicians Nude Palette offers similar shades and hues to the Naked Palette, at a fourth of the cost.  The Urban Decay palette comes with a handy dual ended brush. 

10. Sally Hansen Double Duty Base and Top Coat ($4.99) vs OPI Start to Finish 3 in 1 Treatment ($12.95)
Sally Hansen's Double Duty Base and Top Coat keeps manicures fresh for up to a week.  The OPI version is technically a 3 in 1, so you may benefit a little more from the added strengthener, but I happen to love the inexpensive version.


Wednesday, December 18, 2013

Tutorial: Red Lips (and otherwise natural makeup)


After posting this photo to my Instagram account (@ericabasha, if you want to follow)  I had a request for a tutorial / product information.  This is a typical weekend day look for me, since it is quick, easy and looks put together.  So here it is!


1.  Apply moisturizer to the face as normal.  I also use a tinted moisturizer over my regular moisturizer.  I like Bare Minerals Skincare Tinted Moisturizer because it doesn't make me break out and it has sunscreen in it.  There are SO many formulas out there, including many drugstore brands, so just use what you like!  A BB Cream would work also.

2.  Apply under eye concealer and spot conceal any red areas.  I use Nars Radiant Creamy Concealer for the under eye area, and Bobbi Brown Face Touch Up Stick for the rest of my face.  I recommend applying the under eye concealer with your fingers (helps blend it better) and a synthetic brush for everywhere else (helps it stick better and wastes less product). 

3.  Apply Bare Minerals foundation (or any mineral powder foundation you like) with a big brush.  

4.  Apply bronzer (I like Nars Bronzing Powder in Laguna, but anything will work as long as it is not too shimmery) in a "3" motion on both sides of your face (so it hits your hairline, cheekbone, and jawbone) and over your nose.  

5.  Apply blush to the apples of the cheeks.  I almost always use Nars Orgasm, but any peachy blush will work.  

6.  Fill in eyebrows with the product of your choice.  These days I am using MAC eyeshadow in Omega and a angled brush, then adding a little of MAC's eyebrow pencil in Fling.  Comb through with a spoolie brush.

7.  Put on some mascara.  I obviously have some recommendations on this site:)  

8.  Now this is the more precise step.  Make sure your lips are clean and moisturized (flakey lips never look good) and then line the perimeter of them with a lip liner.  You can use nude, clear, or red liner.  Because the finished look is more natural, you do not have to exaggerate your lip liner or draw a harsh line.  The liner really just acts like a barrier to the lipstick and prevents bleeding color.

9.  Apply the lipstick! I usually just use the tube and apply directly, but you can always use a lip brush (helps with precision) instead.  I used Nars Matte Lipstick in Heat Wave, but any matte red lipstick should suffice.  

10.  This last step is completely optional, but I added a shimmery highlighter to the inner corners of my eyes and to the brow bone.  I used Anastasia Beverly Hills Brow Duality, which is a fat pencil with one matte highlighter and one shimmery highlighter.  A good dupe is NYX Cosmetics Eyebrow Push-up Bra.

And there you have it!  It seems like a lot of steps, but I promise it is a quick process.  If you try it out, please let me know what you think in the comments section.


Monday, December 16, 2013

Inspiration of the Week: Hot pink lips

For some reason I have been into bright pink lips lately.  It is a great alternative to a red lip, and looks chic and pretty.  A bright pink lip looks best with some black liner and lots of mascara.  If you are feeling up to it, false lashes help amp up the look.  Depending on your skin tone, the shade that looks best will vary (anywhere from a reddish pink to a purply pink).

Different shades of beautiful bright pink.  From top to bottom, all via Pinterest:  Ne-uw Tumblr, All Things Makeup Tumblr, The Glitter Guide Tumblr (Collage created in Pic Collage)


Me rocking the pink lip (Nars Satin Lip Pencil in YU) and false lashes for a holiday party.

Saturday, December 14, 2013

A Peak Inside My Vanity

I posted this photo on my Instagram account a couple days ago, and it seemed to draw some interest, so I figured to share it on the blog as well:)  This is my vanity drawer!


From left to right: Assortment of makeup brushes (mostly from MAC, but a couple are Smashbox, BareMinerals, and Sigma); Eyeliners and lip liners (MAC, Urban Decay, Marc Jacobs, Tarte, Nars, Stila, NYX Cosmetics, Tom Ford, Smith's Rosebud Salve); Complexion products, eyeshadows, mascaras, primer, etc (Naked 2 palette,  Benefit Dallas Bronzer, Dior Glow Blush, Nars Orgasm Blush, Nars Laguna Bronzer, Buxom Bronzer, BareMinerals foundation and tinted moisturizer, Aquaphor, Urban Decay Eyeshadow Potion, Nars Concealer, YSL Touche' Eclat, Bobbi Brown Concealer Stick, MAC Omega Shadow (brows), assorted mascaras (L'Oreal, Buxom, Dior). 

Obviously, I have a bit of a product problem:)  However, I use most of these products and what I don't end up using either is given away or makes its way into my freelance kit.  The greatest thing about makeup is that it is relatively inexpensive (depending on the brands of course) and works so well as an accessory to any outfit.  It is always helpful to look at reviews, pins on Pinterest, Instagram, etc, but find what works for you and go with it.  Makeup should enhance your own features, rather than making you look like another person.  Buy and use what suits YOU and rock it!

If you have any questions about any of the products seen here (or anywhere else), please let me know in the comments section. 

 *I also wanted to mention that I am not given any free products to review (I am not big time enough yet!).  If I mention something I love, it is something I have actually purchased and use.  

Wednesday, December 11, 2013

A Quick Lesson on Highlighting and Contouring

I know a thousand Pinterest pins, YouTube videos, beauty blogs, etc cover the concept of highlighting and contouring, but I am doing my own version:)
The general concept of highlighting and contouring is to add brightness/lightness to areas of the face you want to bring attention to (or draw forward), and to create depth in areas you want to create a shadow (or recede).  So remember, light = highlight/"pop" and dark= shade/recession.
When you see all the crazy face charts available on social media, you will notice that generally the highlighted areas are the middle of the forehead, the brow bone, bridge of the nose, under eye area, top of the cheekbones, cupid's bow, and depending on the shape of the face, the chin.  Contoured areas are usually under the cheek bones, the perimeter of the forehead, the sides and tip of the nose, and the jaw line.
Highlighting and contouring can be done very subtly (e.g.: swiping bronzer or contour powder to contour, highlighter powder or cream on the planes of the face to highlight) or very dramatically (e.g.:  the typical Kim Kardashian look, which is done with a lot of concealer and foundation in various light and dark shades).  My esthetic tends to lean toward a more natural look, so my preference is to leave heavy contouring for photo shoots and special occasions.  In person, heavy highlighting and contouring can look jarring and unnatural.  It is totally cool if you are feeling the more dramatic look, I am just giving you a heads up!

I realize this is a very popular topic, so I thought I would do a photo tutorial (my first!).  Here we go!

1.  This is me with my typical eye makeup, brows done, and a light layer of liquid foundation (brand is Face Atelier, which I use in my kit).  I do not normally wear this foundation, as it tends to make me break out if I wear it too frequently (contains silicones, which look great but can make sensitive skin reactive).  Ok, back to the topic at hand! I don't have under eye concealer on, since I am going to add it in the highlighting step.  None of my photos are retouched, as it defeats the purpose of real life makeup.
I am not feeling my hair color here, oh well!  
As you can see, the foundation makes my skin look a little flat.  Highlighting and contouring will bring some depth and life back into my face.  Since my nose is not the smallest, it will also help to shape it to appear a little narrower.  

2.   For highlighting, you will want to use a cream or liquid concealer or foundation (your choice!) in 1-2 shades lighter than your actual skin tone.  For contouring, you will want to use a concealer or foundation 2-3 shades darker than your actual skin tone.  You will also need a synthetic concealer or foundation brush to apply the product and a cosmetic sponge to blend the products (Beauty Blenders are amazing for this, but pricey).
For highlighting, I used the Temptu Concealer Wheel in the lightest shade.  For contouring, I used the darkest shade.  

3.  Apply the highlight shade to the areas of the face you would like to "pop" or illuminate.  For me, I did the areas previously listed. If you want to be really fancy, you can also use the light shade to "carve out" your eyebrows.  This basically means to clean up your eyebrows with the makeup product to make them appear neater/more even (especially along the upper brow).
 Then apply the contour shade to the areas of the face you wish to sculpt.  I chose to sculpt out under my cheekbones, the sides of my nose (going up and slightly underneath the bottom of the inner part of my eyebrow), the tip of my nose, my jaw and my hair line.
Everyone looks like a weirdo during this process! It will look good  in the end, promise.

4.  Blend out the light areas with the cosmetic sponge.  It usually works best if the sponge is slightly damp, so that is what I did.  You want to kind of press or dab the color to blend rather than swiping or rubbing it.  After you are done with the light areas, go ahead and do the shaded areas.  Be sure that there are no harsh lines, and that your jawline area is blended well.  
This is with everything mostly blended.  I thought my nose needed more contouring, so I added it after.
This is with the nose contoured more to my liking.  Sorry that the lighting is a little different here.

 5.  If you want, you can add an actual highlighter to your cheekbones.  I did use a powder highlighter (Tarte's Exposed blush).  You can also add bronzer if you prefer (I did not in this tutorial).  Add blush and then set everything with a loose powder and a big fluffy brush.


The finished product!  

And there you have it!  This is a look that takes some practice, and some getting used to, depending on how much makeup you wear on a routine basis.  Please let me know if you have any questions about this tutorial:)


Sunday, December 8, 2013

Inspiration of the Week: Bold Brows

If you have yet to notice, bolder brows are big (literally) this season.  Over are the days of over plucked arches, and in place you will find clean-yet-full brows.  There is something about a full set of brows that gives off a youthful, fresh vibe.  This look is fairly low maintenance; just pluck stray hairs between and underneath the eyebrows.  If your brows could use a little inflating, try filling them with a powdery brow pencil (try Hourglass's Arch Brow Sculpting Pencil or NYX Cosmetics Automatic Eyebrow Pencil), or one of the new enhancing gel-mousses (like Benefit's Gimme Brow).
Another great tool to achieve this look is a spoolie brush  (the Hourglass pencil actually has one on the opposite end of the wand).  A clean toothbrush will work in a pinch.

From the top: Cara Delevingne (aka Eyebrow Queen), Unknown model, Lily Collins, and Camilla Belle.  All photos from Pinterest.  Collage made with PicCollage.

Thursday, December 5, 2013

Product Obsession: Gift List

Since I am still under the weather, I am gonna wait on the tutorials with photos.  Instead, I am going to tempt you to check out some cool products for the holidays (for yourself, or for a gift!).

I don't know about you, but I always check out Sephora's website to see what new and exciting products are available.  I don't necessary need anything, but I love makeup and I like to see what is out there.

Today I stumbled upon Tarte's LipSurgence Collector's Set, which includes 15 of the brand's awesome chubby lip pencils.  These pencils are super hydrating, come in a multitude of colors (some shimmery, some matte) and leave lips feeling and looking great.  The set seems a little pricey ($175), but for a bunch of gorgeous shades that are formulated without parabens or phthalates (i.e.: yucky chemicals), it may be worth it!

I also love Benefit Cosmetics Little Love Potions gift set, which contains 10 minis of some of the brand's most loved products, including my highlighter faves (Watt's Up and High Beam!) At $36, it is a great deal and a good way to test out the line's products without purchasing the full-size versions.

Last but not least, I would highly suggest Urban Decay's Vice 2 Palette, which I already own, but can't stop raving about.  This palette contains 20 eyeshadows, including matte, shimmery, dark, light, bright/bold, and neutral colors.  Urban Decay's shadows have amazing color payoff and there is such a variety that you could seriously try a different combo every day for a month without repeating.  The brand also released the Naked 3 palette, but I am telling you, the Vice 2 is way more versatile!  It even comes with a double-ended brush (shader on one side, blender on the other).  This set is $59, and is worth every penny!


A glimpse at the gorgeous colors from the Vice 2 Palette by UD. 

Which products are you most excited to try out for the holidays?  Are there any cool beauty-related gifts you plan to give?  Please let me know in the comments section:)